Pages

Subscribe:

Ads 468x60px

Showing posts with label security. Show all posts

Wednesday, November 14, 2018

Hashi Corp KV Secrets Manager integration with SpringBoot Application

Securing your secrets inside application is not an easy task. Typically applications deployed to multiple environments, and developers have to maintain separate credentials for each environment in configuration files, if there is no encryption mechanism (most of the time :( ) those username and passwords or secrets for token generation (API keys), database connections are stored as plain text. If there is a security breach, sensitive data can be compromised and lose millions of your business, because of not having encryption in place.

To address this there are various solutions available in the market. The most popular ones are the AWS Secret Manager, HashiCorp, Google Cloud KMS etc. Most of these services provide Authorization to secret vaults, Verification of Usage of Keys, Encryption data at rest, Automated Key Rotation etc. Selecting a suitable application is depend on your requirement of the organization or by the features of the service. If you are using AWS and deployed your application is cloud, AWS Secret Manager is one best possibility, since the management overhead is minimal. But for some companies which having serious security concerns, they tend to use on premise solution, and Hashi Corp can be a suitable choice. 

The scope of this post is to how to configure and use HashiCorp KV Secret Engine, and consume those secrets inside a SpringBoot application. Image result for hashicorp vault
Image source - https://www.vaultproject.io/
Configuring the Hashi Corp Vault.
1. Download the community version from [1]. https://www.vaultproject.io/downloads.html
2. Extract and set the path to the vault bin

export PATH=$PATH:/home/aruna/vault/bin

3. Start the vault with dev configuration

vault server --dev --dev-root-token-id="12345678" // use secure token to seed

 4. Now open another terminal and put some secrets to the vault, In KV secrets engine version 2 write operation has changed to put.

export PATH=$PATH:/home/aruna/vault/bin
vault kv put secret/my-secret username=spring-user password=se3ret

5. You can test the values are saved to vault using following curl command.

 curl --header "X-Vault-Token: 12345678"        http://127.0.0.1:8200/v1/secret/data/my-secret

      If the request is a success should get the below response.

{  
   "request_id":"b0a0f055-3eed-b3c1-353f-427de8f61bcd",
   "lease_id":"",
   "renewable":false,
   "lease_duration":0,
   "data":{  
      "data":{  
         "password":"se3ret",
         "username":"spring-user"
      },
      "metadata":{  
         "created_time":"2018-11-14T09:21:46.812937558Z",
         "deletion_time":"",
         "destroyed":false,
         "version":2
      }
   },
   "wrap_info":null,
   "warnings":null,
   "auth":null
}

More about the rest API can be found here.
[2]. https://www.vaultproject.io/api/secret/kv/kv-v2.html

Setting up the SpringBoot project to consume the secret stored above.

Add the following properties to your bootstrap.properties file. Before starting the application, these values should be injected to the spring vault to work.

spring.application.name=my-secret // name of the KV secrets engine
spring.cloud.vault.token=12345678 //token value set for server
spring.cloud.vault.scheme=http
spring.cloud.vault.kv.enabled=true

Then load the properties as follows.

@ConfigurationProperties
public class SecretConfiguration {

    private String username;
    private String password;

    public String getUsername() {
        return username;
    }

    public void setUsername(String username) {
        this.username = username;
    }

    public String getPassword() 
        return password;
    }

    public void setPassword(String password) {
        this.password = password;
    }
}


Full sample can be found here. [3]. https://github.com/arunasujith/hashi-corp-vault-sample
That's it for this article, hope you to see you in another exciting post.

Monday, September 25, 2017

oauth2 implicit grant flow - example using facebook oauth2 API

In this post we are going to explore on the oauth2 implicit grant flow using a facebook oauth2 API example. In the oauth2 client specification, the clients are categorized as trusted and untrusted.
Trusted oauth2 clients
Trusted oauth2 clients are usually application following the mvc architecture, where the application has the facility to store the keys securely. In a later post we will explore more on trusted oauth2 clients. 
Untrusted oauth2 clients
Pure html / javascript applications are considered as untrusted oauth2 clients. These applications typically don’t have a way to securely store information. Typically these applications need to initiate the authorization flow for each session.


Normal flow of an untrusted oauth2 client.

Implicit grant flow - sample usecase


The above example use case is for a Travel Buddy App, which needs user’s facebook friend list to suggest the user travel buddies.

  1. User requesting the Travel Buddy App to suggest him more friends.
  2. Travel Buddy App, says, sure I can do that, but first goto this url and authorize me.
  3. Travel Buddy App redirect to facebook Consent Page and presented with a authorization confirmation page with list of scopes.
  4. When user, says yes, redirect to the Travel Buddy App with a token to use.
  5. Travel buddy app initiate a request to get the friend list from facebook, presenting the token received in the previous step.
  6. Travel Buddy app receives the friend list.

So let’s implement this.

I assume you have a facebook account and first you need to register this Travel Buddy App with facebook. Then you’ll receive a client_id for your application.

Facebook settings.
  1. Login to facebook and go to https://developers.facebook.com/
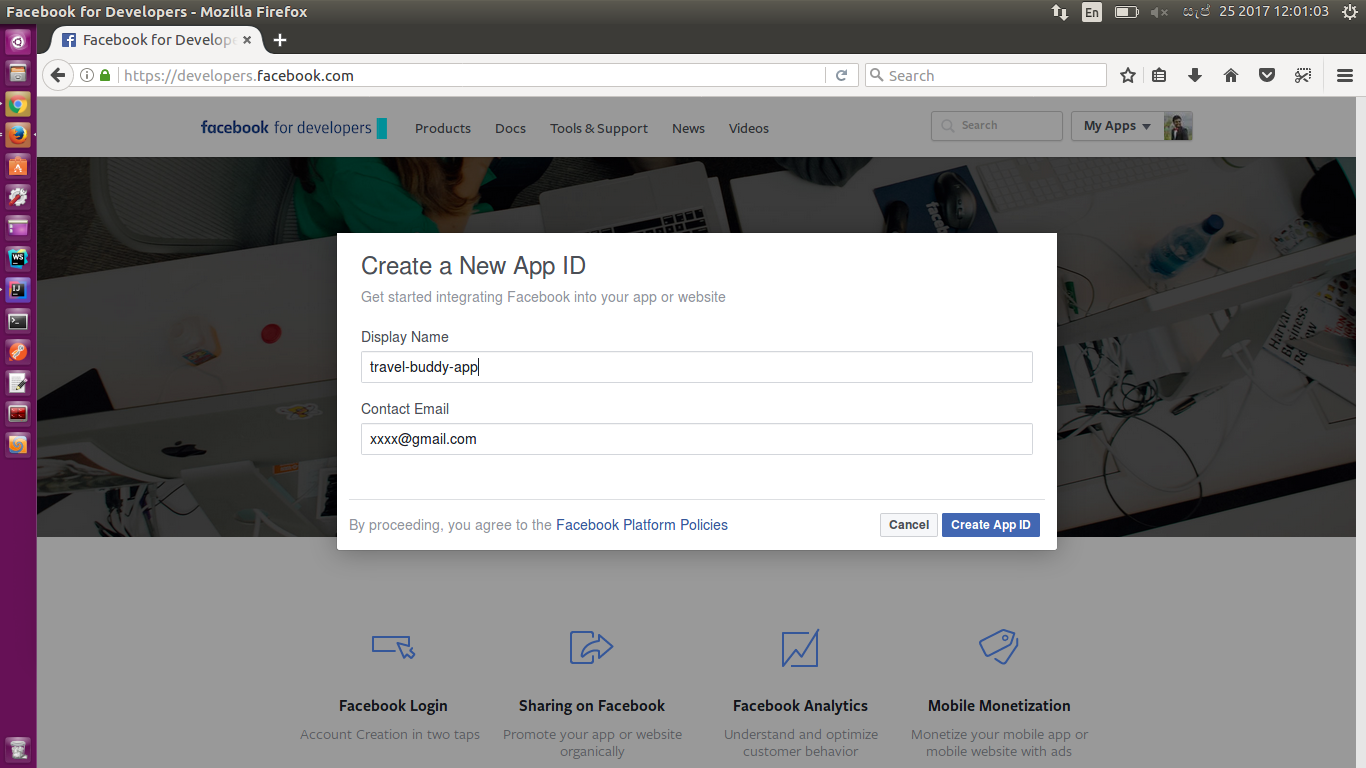
  2. Click on Add a New App and provide a display name and contact email. Click Create App ID.
Screenshot from 2017-09-25 12-01-03.png

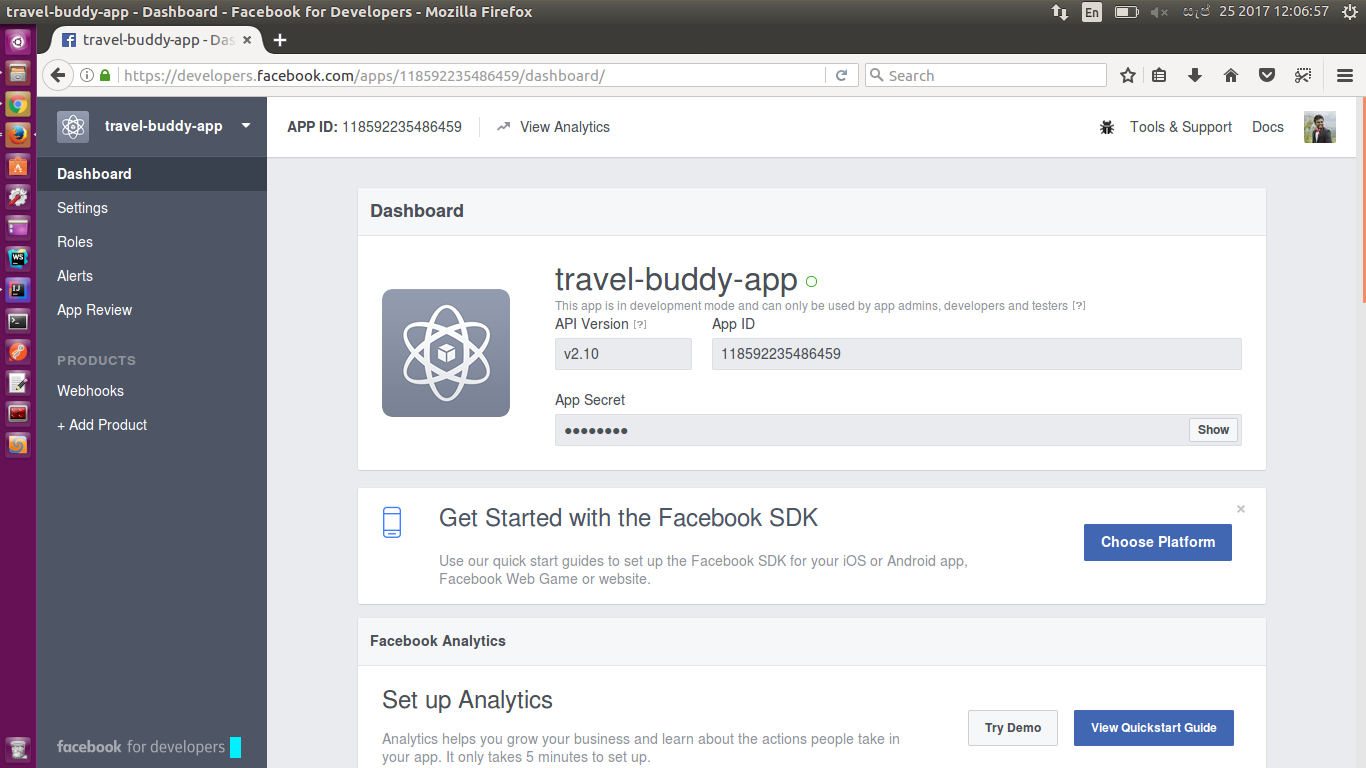
  1. Then you’ll redirected to following dashboard with App Id and App Secret.

Screenshot from 2017-09-25 12-06-57.png

  1. Now select Add Product and select Facebook Login, click setup.
add-product.png

  1. Choose platform web, fill out the details and save.
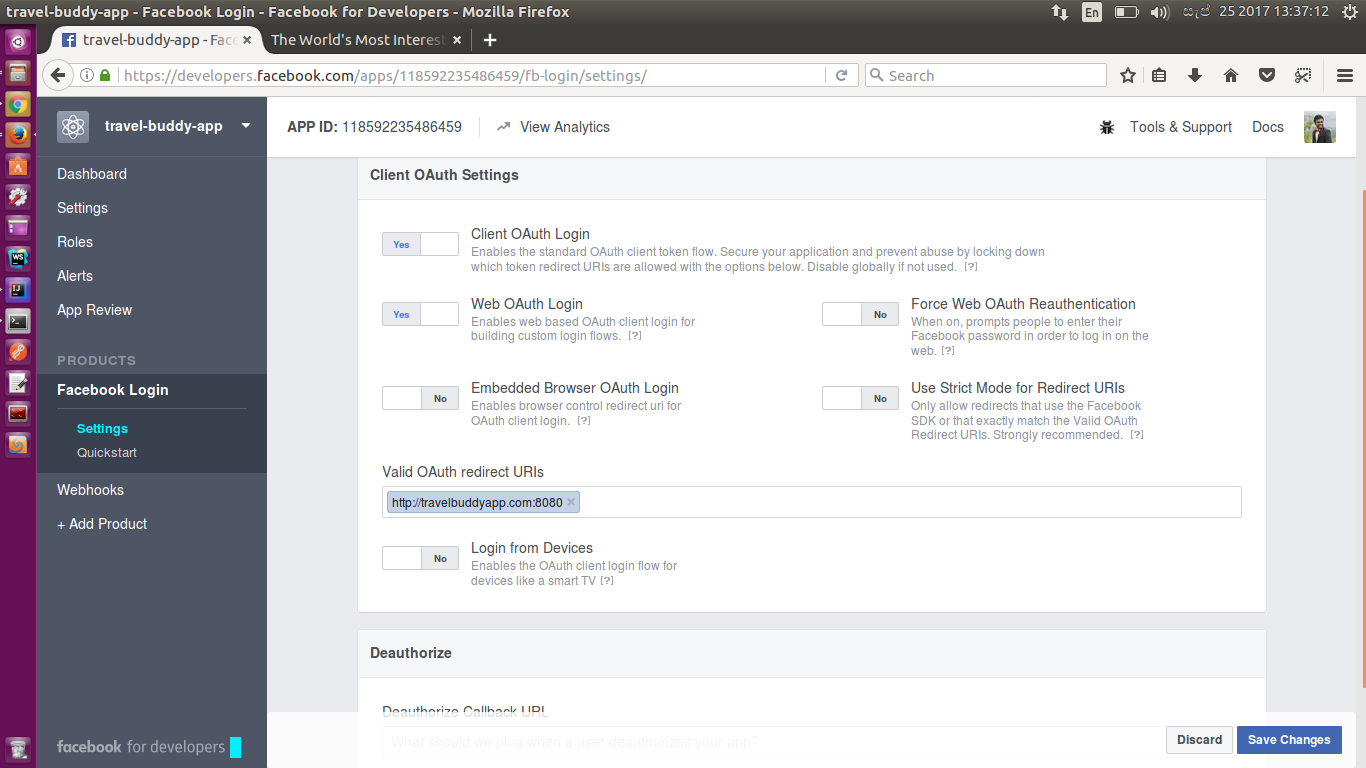
  2. Go to Products -> Facebook Login -> Settings, Add the Valid OAuth redirect URIs, in our sample it is, http://travelbuddyapp.com:8080

oauth.png


Now all set from facebook settings.

Let’s move on the Travel Buddy App implementation.

  1. Need to create a simple web skeleton. You can use the following maven archetype.

mvn archetype:generate -DgroupId=com.sample -DartifactId=travel-buddy-app -DarchetypeArtifactId=maven-archetype-webapp -DinteractiveMode=false

  1. Remove the index.jsp file, since we are implementing a simple html js application.
  2. First we have to write the getting the token function. We have to make  a GET request to dialog/oauth endpoint with the following details.
    var facebookAuthEndpoint = "https://www.facebook.com/v2.10/dialog/oauth";
    var responseType = "token";
    var clientId = "118592235486459";  
    var redirectUrl = "http://travelbuddyapp.com:8080/callback.html";
    var scope = "public_profile user_friends";
    
  1. Since we are  s the application to redirect, we have to provide the redirectURL. The scope is the permission list we are requesting from the user. In this case we need public_profile and user_friends.
Note that the permission list in scope variable is given a space separated list.
  1. The calling URL will be similar to the following, Note that the url parameters needs to be encoded.
https://www.facebook.com/v2.10/dialog/oauth?response_type=token&client_id=118592235486459&redirect_uri=http%3A%2F%2Ftravelbuddyapp.com%3A8080%2Fcallback.html&scope=public_profile%20user_friends

  1. Then after redirecting to facebook website, if the user is already logged in, he will be presented a user consent page. If not first redirected to the login page.
  2. After the authorization of the user, will be redirected with the token appended to the browser URl. Process the browser URl and acquire the access_token.

var fragment = location.hash.replace('#', '');

  1. Then we have to make two API GET calls to facebook using this access token.

I. Make a call to get the profile details and extract the profile ID.
II. Make another call to get the suggested friend list using that profile ID.

       var userEndpoint = "https://graph.facebook.com/v2.10/me?fields=name&access_token="  
                                                                    + accessToken;
       var userId = "";
       //ajax GET call to get user ID
       $.get(userEndpoint, function(data, status){
           userId = data.id;
           var friendListEndpoint = "https://graph.facebook.com/v2.10/" + userId + 
     "/friends?access_token=" + accessToken;

           $.get(friendListEndpoint, function(data, status){
                 $("#response").html(JSON.stringify(data));
           });
       });          

  1. We just showing the friend list appended to the html.

Now that’s it, you have acquired oauth2 token using the implicit grant flow approach and use that to extract the friend list.

Testing the Application.

  1. Set the following host entry.
127.0.0.1    travelbuddyapp.com
  1. Deploy the webapp in tomcat and access the following url.
http://travelbuddyapp.com:8080/
  1. Click the Call Facebook
  2. And you’ll get the friend list data.

So we have covered the implicit grant flow and the few characteristics we observed is that, it’s pretty straightforward to implement. And the negative points to be considered are approach is considered as to be less secure since we are exposing the access token, this is a short term access methodology, Since there is no way to securely store the keys, the authorization flow has to be reinitiated for latter use. Sample code can be found here. 

Let’s meet with a new blog post on oauth2 authorize grant flow exercise.